Showing posts with label Bathroom. Show all posts

Sunday, March 22, 2015

Toilet Paper Holder

***EDIT*** Apparently a stud finder can detect re-bar in the walls. Who knew? Hat tip to "A" for finding it out..

After 6 years we finally decided to get the TP roll off the floor. This bathroom is so small that we were unsure of how to do it. We knew that a normal TP holder would not work because it would stick out too far and probably be ran into all the time. Which would correlate to bruised legs and the need to constantly reattach it to the wall.

We thought about having a floor stand like the master bath but it would need to be moved around depending if you needed to take a shower. In the end we decided to get a recessed one. We wanted a white ceramic holder but damn they are expensive ($60+). We found a nice white metal one at Home Depot for about $15.

Normally installing one would take about 15 minutes. Use a stud finder and then cut a hole in the drywall between the studs, no problem. However, as you are aware, our house is not normal. Can't find our studs with a stud finder, all you can do is guess. So I thought to place the holder in the middle below the window with the thought that the re-bar would be just outside the window frame. Of course I guessed wrong. I drilled my exploratory hole and sure enough, I hit re-bar. So unfortunately it is slightly off center. But hey, it's off the ground.


What are the odds of a re-bar stud being there

About 100%

Add caption


Tuesday, August 13, 2013

Renovations Part 3

The Electricians did their thing and the painter kind of did his. I got word that the work was done and all that remained was to clean up. Mmmm maybe not so fast. The guy said to take a look and if I noticed anything then to write up a punch list.  They were suppose to use flat paint for the entire condo except the kitchen, bathrooms and doors. It turns out that everything was done in flat (actually eggshell).


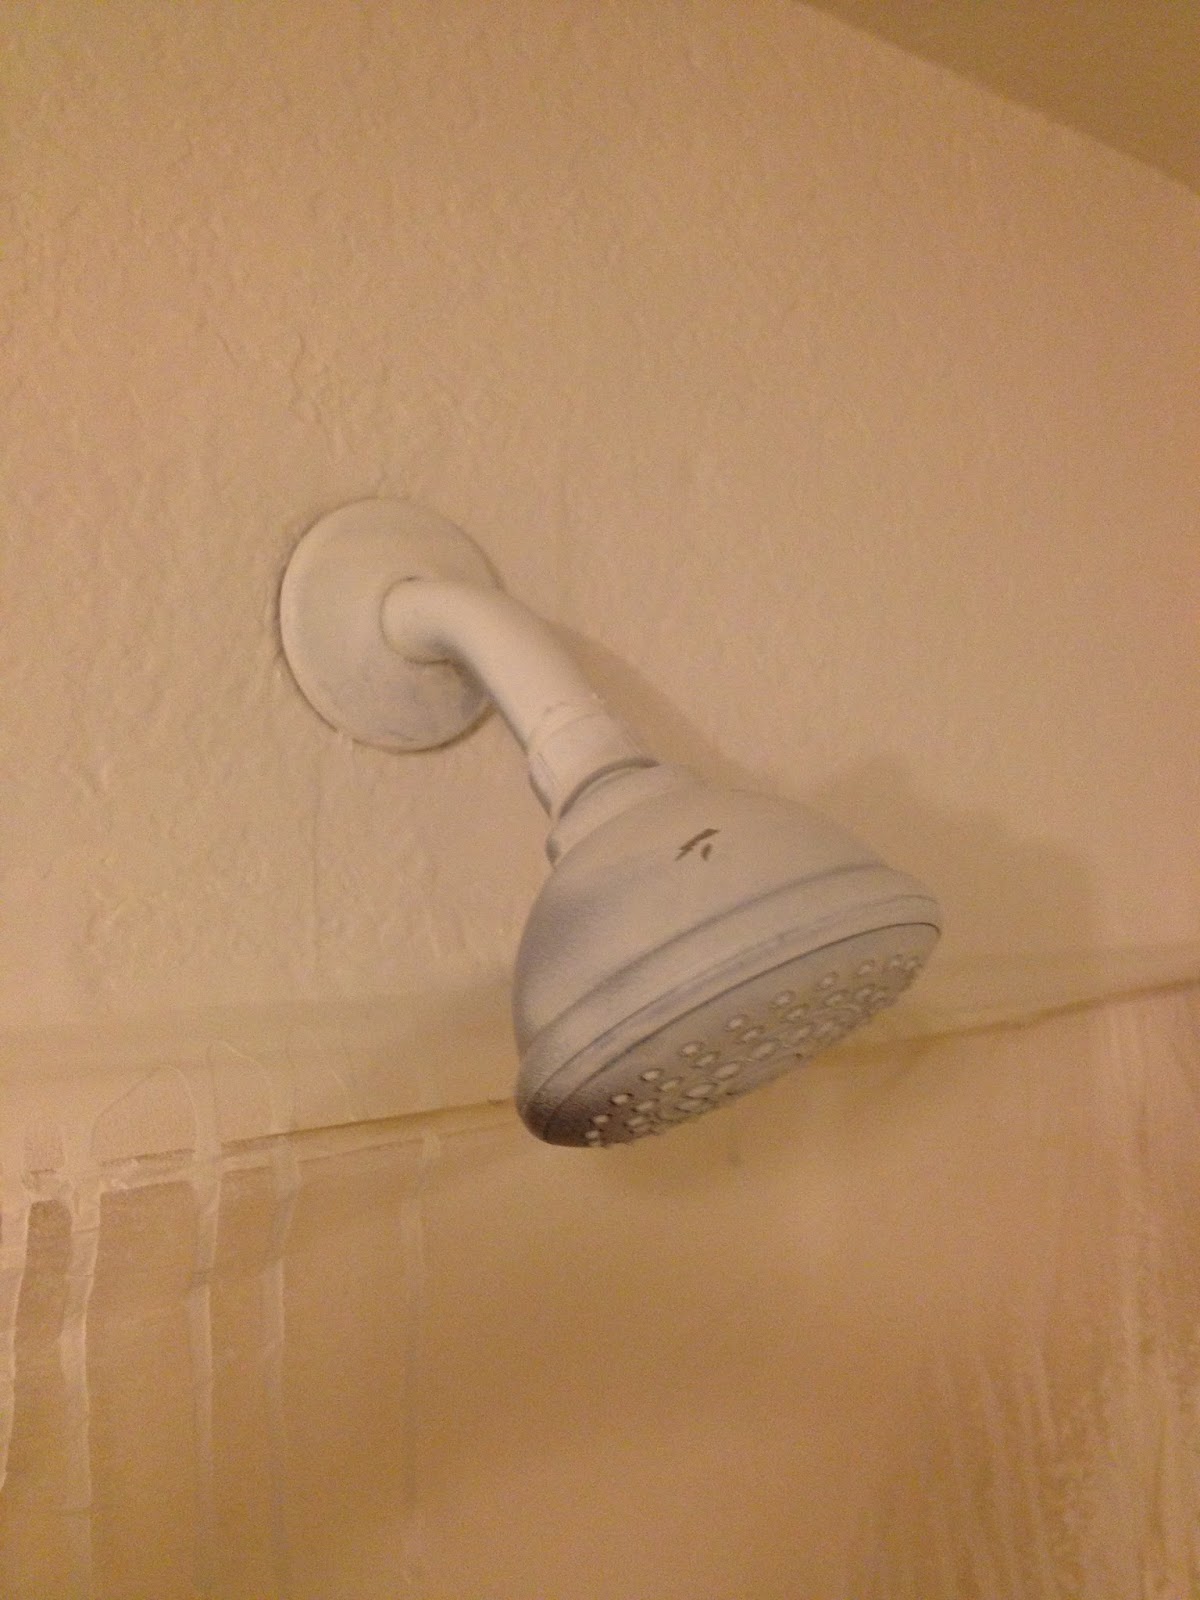
Then I discovered they painted over the bath fixtures. Not sure why they did that, but not good. And it continued downhill, because someone used the toilet in the guest bathroom and did not flush it. Now granted the handle was broken, so it would not flush, but is it that hard to lift up the tank lid and pull the flapper up? I mean C'MON MAN!!  I guess the guy figured out that something was wrong when his turd didn't magically go away. He must have thought that the water was off so he turned the water supply "off". Guess he never heard of "righty tighty, lefty loosey".  So if you turn the knob and you turd still doesnt go away, LIFT THE DAMN TANK LID AND TAKE A LOOK!!!! Nope "I'll just leave it and hope no one notices".


Moving on they also painted over the vents, which is actually a good thing, because they were pretty nasty and we were thinking of replacing them.

There were other smaller discrepancies and so I made the punch list and also texted Elmer. He is the guy in charge and I am pretty sure he did not do this painting job.  I got a text back this morning and he was not too happy. He left the painter on his own to do the job trusting that he would do a good jobe. It turns out the semi-gloss was there but the guy he used to paint did not "notice" it. So today he is sending over another painter to repaint using the semi-gloss and fix all the over spray.

Speaking of over spray, I mentioned that one of the toilets handle was broke? Well we bought two new toilets (which we will get a rebate on due to the high effecincy) and placed them in the bath tub for the floor guys to install. Damn if the painter did not get paint on it when they washed their stuff in the tub.


Apparently my dry wall patch job and texture work sucked. Once the paint was up it really stood out. More work for me, yea!  These are the photos before the painting.


Thursday the floor guys should begin their work!


Friday, April 26, 2013

Fountain...Toilet...What's the difference?

It was such a beautiful day that when I got home this afternoon I decided to wait outside in the courtyard for "A" to get home. I walked over to the fountain and noticed the water was dirty. As I looked closer I was like "oh no way in hell did someone crap in my fountain!" But alas some scumbag did in fact defecate in my nice clean fountain. Of all the things that I thought might happen, I can honestly say this was one that never came to mind.

So I spent the next hour and a half emptying it and then using bleach/water to disinfect it. I just pretended that I was a plumber and they do this stuff all the time.

So there are going to be a few changes:
1. My landscape lights are now going to be on dusk to dawn.
2. I am going to install some cameras.
3. Booby trap the fountain with something that will blow their B@@LS off next time.

I have once again put the picture below the fold so that if you did not want to look at it you won't have too. But we both know that you really will look at it :)


Friday, November 23, 2012

Master Bath finally completed

We have been using the bathroom now for a couple of months but two weeks ago we have finally completed all work. The last piece was the threshold that we ended up ordering on-line.


 If you remember we both took a week off from work with the hope of actually getting most if not all of it done. However we both got sick and then finally decided to take are time and do this as best as possible which turned out to be the best move.

Below is the "transformation" of the master bath.


Wednesday, August 8, 2012

Completing the Vanity

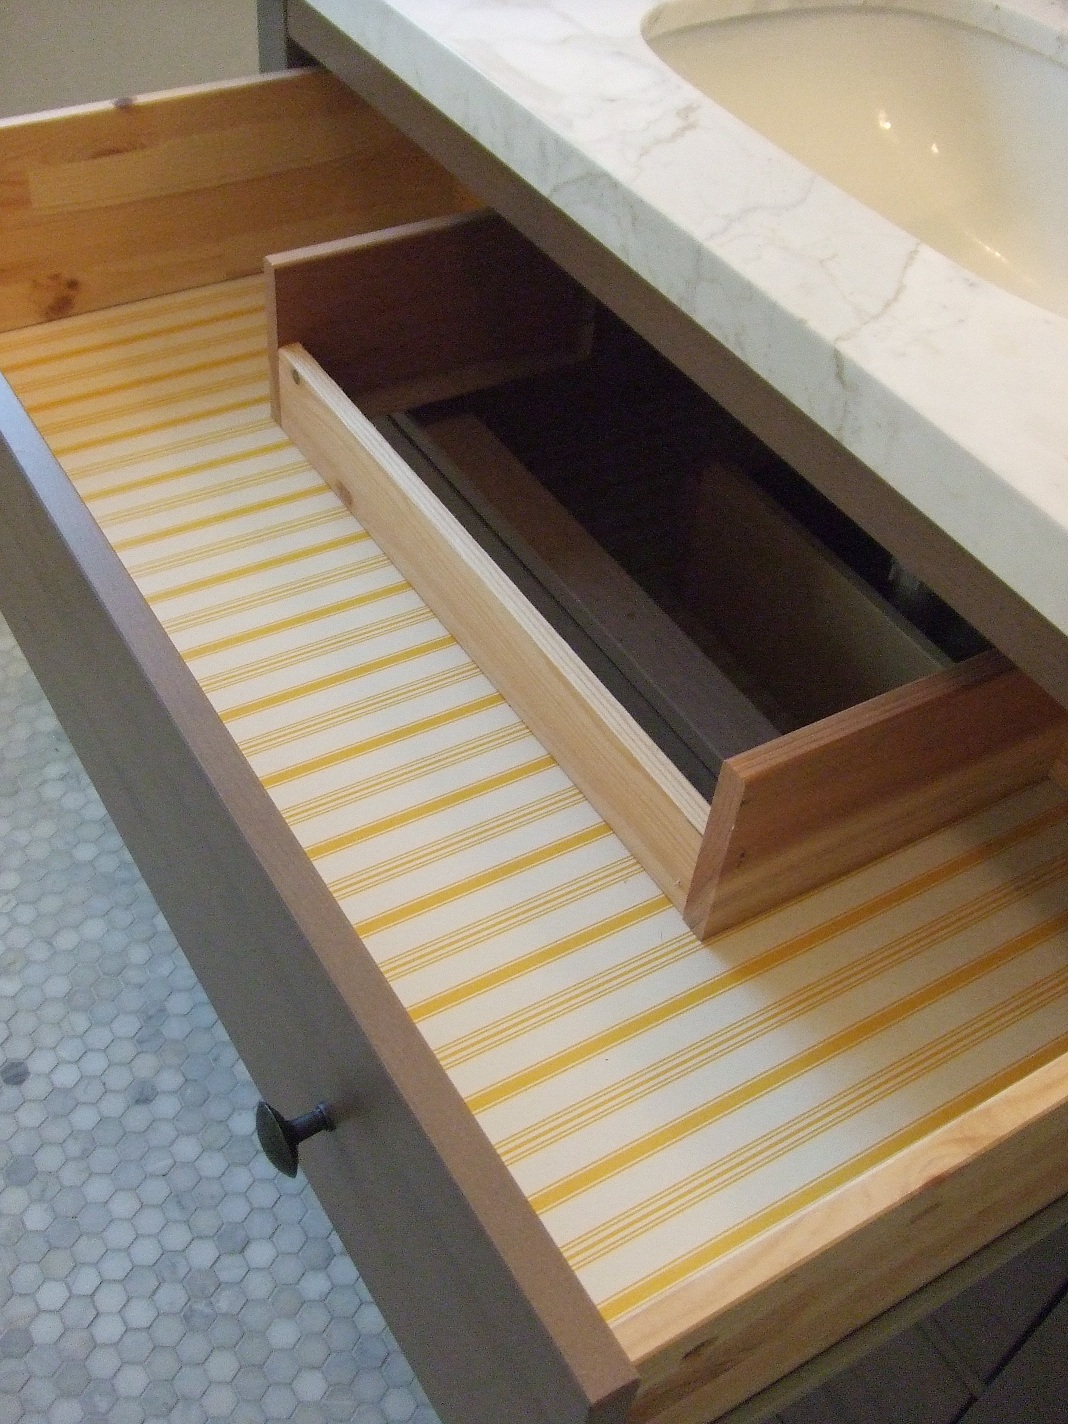
If you remember, we took an IKEA dresser drawer and hacked it into a vanity. One of the problems with this, is the drawers will not close because of the plumbing.

So "A" made the plan of how we can modify the dresser. In the end it was much easier than what I anticipated. We used a leftover piece of redwood that was the same thickness but was an inch shorter.

On the top drawer the sides had to be narrower and the middle piece needed to be shorter because of the sink.

The only tools needed was a tape measure, miter saw, jig saw, staple gun with compressor, and wood glue. It took less than two hours and that is with a lunch break.


Saturday, July 21, 2012

Master Bath Project Nearing the End

Today we are one step closer to finishing this project. I have installed the faucet for the vanity and we replaced the light fixtures. This week the glass company finally came and installed our glass wall and delivered the two pieces of glass for the storage cabinet.


We bought a glass door cabinet from IKEA for storage since we needed a replacement for the one we took out. We liked it a lot but didn't like the solid panels on the side and "A" found a site called IKEA Hackers, just as the title says, they take nothing but IKEA furniture and modify them. In this particular case we removed the top side panels and had glass made to replace them. Brilliant!!!


Today I installed the toilet which was not as easy as it should have been.  When we removed it at the beginning of the project there was a mortar base that it was resting on. I thought that when we resurfaced the floor and then installed the tile it would raise the floor up enough so that the toilet would rest on the floor. But, alas, that is not the case.


As you can see the flange is too high and now I had to figure out the best way to fix it.
  1. Call the plumber and pay several hundred dollars to lower the flange and possible damage the floor.
  2. Raise it with a bed for mortar.
  3. Shim it and call it a day.
I went with door number three.
 
I bought some shims, and unlike our Olympians uniforms, these are made in the good 'ole U.S. of A. I then took epoxy, and fixed the shims to to the toilet so that they wouldn't shift. Leveled it out and now we have a working toilet. I just need to either grout or caulk around the front of the toilet so that it will fill the gap. I will leave the back exposed just in case I have any leaks.


Now we just have to fix the gap from the tub and tiles and then modify the drawers on the vanity to fit around the plumbing.

Monday, June 11, 2012

Master bath project and outdoor project part 7

Finally both projects are coming to a close. Rich, the contractor, finished his part of the project and now it is up to us to complete it. Namely painting and staining. This weekend our friends came over to help us prime the fence. We started at 0900 and they were able to stay until about 1230. However, "A" and I continued and finished around 1700.


Working Party


We decided to tint the primer.


 When you look at what needed to be done it did not look that difficult, but in reality it is completely different. The plan was to prime on Saturday and then paint on Sunday. Needless to say Sunday kinda went by the wayside.

Although Sunday wasn't a complete waste because I was able to get the sink hooked up. Last weekend we grouted the floor and the walls and on Thursday the fabricator installed the marble and it looks wonderful.


We are really excited to be nearing the completion of the two big projects. Does that mean we are done? Nope, but I think all major projects have ended. We should not have anything close to the scope of what has been completed.

Monday, May 28, 2012

Vanity for the Master Bath

We mulled over what to use for a vanity; pedestal sink?/actual cabinets?/or something completely different? We decided on something completely different. "A" found a website called IKEA Hackers, this is where people will take IKEA furniture and re-purpose it to suit their needs other than what it was originally designed for. Actually we are using another piece of hacked IKEA furniture and using it for a storage cabinet in the bathroom, but that will be another post.

This particular piece is a three drawer dresser that we will use as a vanity.  The first challenge is that it is 38" tall, way too much for a vanity. We wanted it around 36" when the marble is installed which meant that we needed to cut almost three inches off the legs. Our big concern is to cut them uneven thus rendering a $149 piece of furniture useless.

So I needed to buy a better blade for my saw since the current blade only had 24 teeth. Quick trip to Home Depot and now I have a blade with 60 teeth. "A" measured the distance, I made the cuts and it turned out perfect.

Once we have the sink installed I will need to re configure the top drawer and maybe the middle one to accommodate the plumbing.