Cabinet install. Well as usual I am behind the times but instead of making one really large posting I will break up it up into the final two. We installed our cabinets in mid December and it went pretty smooth. the hardest part is to ensure they are all level and when you have walls that aren't strait and floors that are not level it can be a challenge.
Showing posts with label Kitchen. Show all posts
Showing posts with label Kitchen. Show all posts
Sunday, February 19, 2017
Monday, December 12, 2016
Now The Ktichen (Part 3)
The project is moving along really well. Before I was able to grout the tile we needed to hire an electrician to install the LED lights and add some switches in the living room and dining room. The cabinets were delivered and I finished the grouting of the tiles.
The last thing I had to do before we could install the cabinets was to repair the walls. Repairing walls isn't that hard but it is a pain to try and make it look like there never was any repairs made. I didn't repair the wall where our window is because we plan on enlarging the window and doing extra work that will just be demolished is not my idea of fun.
The last thing I had to do before we could install the cabinets was to repair the walls. Repairing walls isn't that hard but it is a pain to try and make it look like there never was any repairs made. I didn't repair the wall where our window is because we plan on enlarging the window and doing extra work that will just be demolished is not my idea of fun.
 |
| New Kitchen |
Monday, November 28, 2016
Now The Kitchen (Part 2)
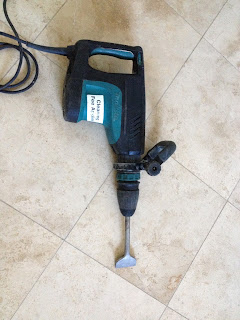
Now that the kitchen cabinets are removed it was time to start on the floor. As the say "the right tool for the job" is really important. To get the tile up, I needed to get an impact hammer/chisle. So I spent $50 and rented one from Home Depot. It took about 2 hours to take up the tile and another hour or so to load it into the truck and go to the dump.
We then installed the backer board where I used 400 screws to insure it was not going anywhere. After taping and mortaring the joints we began the tiling process. This is the part I was really not looking forward to. Tiling is not rocket science but it takes a toll on your back and knees.
We then installed the backer board where I used 400 screws to insure it was not going anywhere. After taping and mortaring the joints we began the tiling process. This is the part I was really not looking forward to. Tiling is not rocket science but it takes a toll on your back and knees.
 |
| loaded up |
 |
| in line at the dump |
 |
| sub-floor ready |
 |
| backer board and 400 screws down |
 |
| plans for the backer board and tile |
 |
| sorted by pattern |
 |
| keytile down |
Subscribe to:
Posts (Atom)


