Sunday, March 31, 2013
Monday, March 25, 2013
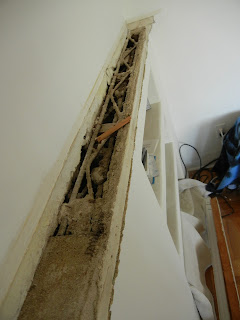
Always cut away from yourself
Sunday we sold the stand that came with our TV we bought in September. I was going to toss it because I didn't think anyone would actually buy the stand since most people hang them on their walls. However "A" wanted to put it on eBay and it actually sold for $40. I know!! I couldn't believe it either.
So to save $$$ on the shipping I decided to cut down a box to fit the TV stand. Now you should always cut away from yourself and I usually do. But this time I cut towards myself and the box cutter slipped off the box.
I was sitting cross legged and had the cutter in my right hand. It came back and got me on the left shin just below the knee. I was lucky that it got me there because the bone stopped it from going deeper.
I was really mad because I cut through my jeans and ruined them. So I went to the bathroom and used hydrogen peroxide to clean the wound. It wasn't really big because it was a puncture wound but I knew it went to the bone. I then used antibiotic ointment and put a band-aid on it.
As I thought more about it, I couldn't remember when my last tetanus shot was so I put a call into the VA to find out. I then went back to work, however as I looked at the blade on the cutter I noticed the tip was missing. Son of a #*%#@! the tip broke in my leg. It was a small piece but I figured I should get it looked at to make sure.
I go to the ER at Balboa Naval Medical Hospital where they X-ray my leg and tell me, yep you do have something in there. The Corpsman starts to work to find it but the opening is so small he has to enlarge it. After about 20 minutes of digging and two trips to look at the X-ray he consults with the Dr. and they decided instead of doing more damage they would just leave it in there. I am pretty sure it is buried in the bone.
So I get three stitches, a tetanus shot in the arm and an antibiotic shot in the ass which hurt like hell.
**********WARNING!! GRAPHIC PHOTOS BELOW. DISCRETION IS ADVISED**********
**********警告!下の図の写真。裁量は通告されてい**********
Saturday, March 23, 2013
Fireplace Mantle
Our fireplace mantle was a questionable piece. On one hand it was functional and had plenty of space to put stuff. On the other hand it seemed out of place in our style of house. Although our style of house is different anyway (Spanish Art Deco). But the mantle was an oak slab with crown molding, no where else in our house is there any crown molding.
Many Spanish style houses do not have a mantle per se and they are finished in plaster. Plus our mantel was really really long, like 10' long. It was in your face and it just looked odd. The plan was to take off the mantel and refinish the top for a smooth plaster look.
Overall it was a really easy project but time consuming because of the need to use four layers of compound mud and get it smooth. Not to mention I just didn't have much motivation to complete it.
Upon removing the mantel I realized I had more work to do than expected. After working on this house the last four years I don't know what I was really thinking. As with any old house you ALWAYS have more work than you expected. The right side was completely open and it would not be as simple as smoothing out the existing plaster with a thin coat. I went to home depot and had to get metal lathe to cover the opening enough so that the compound could stick.
Four layers and a month and a half later it is finally completed!!


Thursday, March 14, 2013
Spammers
A few months ago I started receiving an "anonymous" comment on the same post over and over. It was a BS comment meant to direct someone to some stupid spam site.
Some of you might have noticed that I changed the way I allowed you to make comments. You had to type in a phrase or "CAPTCHA". Well when I did that the spam stopped so recently I removed that feature but now the spam has started again.
So I apologize and must go back to requiring you to verify that you are a human being before submitting any comments.
Tuesday, March 12, 2013
IKEA Hackers
Just a quick post today.
As you know we like a lot of IKEA stuff. There is a website dedicated to IKEA Hackers. Basically people take what they purchased at IKEA and modify it to suit their style or need.
Well "A" gets many of her inspirations from the site and she submitted two or our "hacks" and they both got published.
http://www.ikeahackers.net/2013/02/vanity-from-hemnes-dresser.html#comment-form
http://www.ikeahackers.net/2013/02/pharmacy-cabinet-from-hemnes-cabinet.html
Sunday, March 10, 2013
Table Building Part 2
The tables are assembled and the only thing remaining is to decide on the finish, which is easier said than done. For this I defer to "A" because I am pretty easy going, or if you ask her "I don't care" :) Partially true, because she does have really good taste and our tastes are very similar. The whole trick to anything we do is she comes up with ideas and I am generally good with almost everything. Occasionally I have to veto something, maybe 10 ideas and I don't like 2, but in the end we usually have a really nice design. Courtesy of "A", I am just the hired help.


The choices are:
1. Wax.
-We tried the wax and it does look good but it is easily marred with a finger tip. I guess it would be high maintenance and the need to continually buff. So this one is out.
2. Whitewash Stain using diluted white paint.
-This looks pretty good and might be a contender for at least the dining table if combined with the oil. This would make the table lighter than just the oil.
3. Just polyurethane.
-This one is out because we do not want it to look like "plastic".
4. Sun bleached stain.
-Tried this, but didn't like the results so this one is out.
5. Watco Oil over raw wood. (My Favorite)
-This was really nice but it might have made the wood a little too dark. This one could work for the breakfast nook since that room receives more natural light, but probably not for the dining room.
Below are the results of the oil and the whitewash with oil.
What do you think?


Sunday, March 3, 2013
Table Building Part 1
Last weekend we built our breakfast nook and dining tables with the help of our friends.
For the table tops we went with kiln dried Douglas Fir and the legs are made out of Douglas Fir 4x4s that we bought at Dixieline. The breakfast nook top is 2x8 and the dining room is 2x12. Because they have an actual "mill" area we had them cut the wood for us. The long pieces were no problem but the side pieces at the end were measured incorrectly by yours truly. For some reason I thought that the 2x8 would be 7.5" wide and the 2x12 would be 11.5" wide and it appears that I was wrong. I know, SHOCKING!!!
Thankfully They were too long and we were able to take them back to Dixieline to re-cut. Where apparently I screwed up again, %#*&@@!!! The dining room table was perfect but the breakfast nook as too damn short!!! "A" again came to the rescue and we trimmed the edges to make it look intentional, at least I hope. "Act Natural".


We also picked up a new tool, a Kreg Jig. I really should have gotten one a long time ago. It creates hidden pocket holes when attaching wood together, so convenient.


Our friends were very helpful in building the tables and we really appreciate it.
Subscribe to:
Posts (Atom)